Aprilaire 700 Whole-House Humidifier: Installation Manual Plan
This comprehensive guide details the professional installation of your Aprilaire 700 humidifier, ensuring optimal performance and years of reliable humidity control within your home.

Welcome! This manual provides detailed instructions for installing the Aprilaire 700 Whole-House Humidifier. Designed for optimal performance and efficiency, the Aprilaire 700 delivers consistent, comfortable humidity throughout your home, especially during dry winter months.

This model utilizes a fan-powered evaporation system, drawing moisture from your water supply and distributing it via your existing furnace ductwork. Proper installation is crucial for maximizing the humidifier’s benefits and preventing potential issues like water damage or inefficient operation.
Before beginning, carefully read this entire manual to understand each step. This guide assumes a basic understanding of HVAC systems and standard plumbing/electrical practices. If you are uncomfortable with any aspect of the installation, consult a qualified professional.
Safety Precautions
Important Safety Information: Installation involves working with electricity, water, and potentially hazardous tools. Always disconnect power to your furnace at the breaker box before commencing any electrical work. Failure to do so could result in severe injury or death.
When working with plumbing, ensure the water supply is shut off to prevent flooding. Wear appropriate safety glasses and gloves to protect against debris and potential contaminants. Be mindful of sharp edges on ductwork and the humidifier unit itself.
This humidifier is intended for indoor use only. Do not expose electrical components to water. If you are unsure about any safety aspect, consult a qualified HVAC technician or electrician. Prioritize safety throughout the entire installation process.
Electrical Safety
Crucial Electrical Guidelines: Before initiating any wiring, completely disconnect power to the furnace at the main breaker panel. Verify the power is off using a non-contact voltage tester. Incorrect wiring can cause electrical shock, fire hazards, or damage to the humidifier and furnace.
Ensure all wiring connections are secure and comply with local electrical codes. Use appropriately sized wire connectors and follow the wiring diagram precisely. Never work with wet hands or in damp conditions when handling electrical components. If the furnace wiring is damaged, consult a qualified electrician for repairs before proceeding.
Double-check all connections before restoring power.
Plumbing Safety
Essential Plumbing Precautions: Before connecting to the water supply, shut off the main water valve to your home. Relieve water pressure in the line by opening a nearby faucet. Improper plumbing connections can lead to water leaks, property damage, and potential mold growth.
Use only approved fittings and materials compatible with potable water systems. Ensure all connections are watertight to prevent leaks. When installing a saddle valve, verify it’s properly secured and pierces the water line cleanly. Avoid over-tightening fittings, which can cause damage.
Inspect drain lines regularly for clogs or leaks.
Tools and Materials Required

Essential Tools: You will need a screwdriver set (Phillips and flathead), adjustable wrench, pipe cutter, drill with various bits, Teflon tape, level, and potentially a hole saw. A multimeter is crucial for electrical connections.
Required Materials: Aprilaire 700 humidifier kit, appropriate water supply line (copper or PEX), saddle valve (if applicable), drain tubing, electrical wiring connectors, wire strippers, and a bucket. Consider purchasing a water leak detector for added safety. Ensure you have replacement screws and mounting hardware if needed.
Unpacking and Inspection
Carefully unpack the Aprilaire 700 humidifier from its shipping container. Inspect all components for any signs of damage incurred during transit. This includes the humidifier housing, water panel, solenoid valve, control panel, and all included hardware.
Verify that all parts listed on the packing list are present. Do not proceed with installation if any parts are missing or damaged. Contact your supplier immediately to report any discrepancies. Retain the original packaging until you’ve confirmed the unit is functioning correctly. Document any damage with photographs before disposal.
System Compatibility Check
Before installation, confirm your existing HVAC system is compatible with the Aprilaire 700. Crucially, verify your furnace’s airflow capacity meets the humidifier’s requirements – typically between 300 and 600 CFM. Insufficient airflow will hinder performance.
Assess your ductwork for adequate size and sealing. Undersized or leaky ducts can reduce humidity distribution. Ensure sufficient space is available near the furnace for mounting the humidifier and accessing components for future maintenance. Confirm a suitable water supply line is accessible within a reasonable distance.
Furnace Compatibility
The Aprilaire 700 is designed for compatibility with most forced-air furnaces, including gas, oil, and electric models. However, confirm your furnace’s BTU input and airflow capacity. Generally, furnaces with outputs between 40,000 and 120,000 BTU/h are suitable. Crucially, the furnace blower must deliver between 300 and 600 CFM for optimal humidifier operation.
Avoid installation on furnaces with continuously running blowers, as this can lead to over-humidification. Check for existing humidifier provisions on the furnace control board; if absent, a compatible control board or adapter may be required. Verify adequate electrical capacity is available for the humidifier’s operation.
Ductwork Considerations
Proper ductwork is essential for effective humidity distribution. Ensure your duct system is adequately sized to handle the increased airflow from the humidifier. Ideally, the humidifier should be installed on the return side of the furnace, before the blower. Avoid sharp bends or restrictions immediately before or after the humidifier outlet.
Consider duct insulation to minimize condensation. Inspect ductwork for leaks and seal them appropriately. For optimal performance, the humidifier outlet should connect to a main supply duct, allowing for widespread humidity distribution throughout the home. A dedicated duct run is recommended for larger homes or complex duct systems.
Humidifier Placement & Mounting
Select a location near a suitable water supply and drain. Ensure adequate space around the unit for maintenance and access to components. Mount the Aprilaire 700 securely to a solid surface, such as a furnace plenum or wall stud, using appropriate hardware. Verify the mounting surface can support the unit’s weight when full of water.
Maintain sufficient clearance from electrical components and heat sources. Consider airflow patterns when choosing a location; avoid obstructing airflow to the furnace. Level the humidifier before securing it to prevent water spillage. Proper mounting minimizes vibration and noise during operation, contributing to a quieter system.
Water Supply Line Connection
Connect the humidifier to a cold water supply line, typically ½ inch copper or PEX tubing. Choose either a saddle valve or a direct water line connection, based on your plumbing setup. If using a saddle valve, ensure it’s installed on a straight section of pipe and properly sealed. For direct connections, use a dedicated shut-off valve for easy maintenance.
Apply Teflon tape to all threaded connections to prevent leaks. Avoid using hot water lines, as high temperatures can damage the humidifier. Inspect the connection thoroughly for leaks after installation and initial startup. Proper water line connection is crucial for reliable humidifier operation and prevents water damage.
Saddle Valve Installation (If Applicable)
Select a straight section of the cold water pipe for saddle valve placement, avoiding areas with corrosion or obstructions. Drill a hole according to the valve manufacturer’s instructions, using the correct size drill bit. Ensure the rubber gasket creates a watertight seal against the pipe. Tighten the saddle valve clamps securely, but avoid over-tightening, which could damage the pipe.
Connect the humidifier’s water supply tubing to the valve’s outlet. Slowly open the water supply valve and check for leaks around the saddle valve and tubing connections. Monitor the connection regularly for drips or signs of water damage. Saddle valves are a temporary solution; direct connections are preferred.

Direct Water Line Connection
Locate a cold water pipe near the humidifier installation. Install a dedicated shut-off valve on the chosen pipe for easy maintenance and emergency shut-off. Cut the pipe using a pipe cutter, ensuring a clean, square cut. Use a compression fitting or solder to connect a threaded adapter to the pipe.
Attach a length of flexible copper or PEX tubing to the adapter. Connect the tubing to the humidifier’s water inlet, using appropriate fittings. Slowly open the shut-off valve and inspect all connections for leaks. Direct connections provide a more reliable water supply than saddle valves.
Drain Line Installation

Proper drain line installation is crucial to prevent water damage. Route the drain line from the humidifier to a suitable drain location – a floor drain, standpipe, or exterior ground discharge (check local codes). Avoid routing the drain line uphill, as this can cause water to back up. Use 3/4-inch PVC or polyethylene tubing for the drain line.
Secure the drain line with clamps or supports every few feet to prevent sagging. Ensure an air gap between the drain line and the drain to prevent back-siphoning. Test the drain line by slowly filling the humidifier’s water panel and observing the drainage. Verify proper flow and no leaks.
Electrical Wiring
Before commencing electrical work, always disconnect power to the furnace at the breaker box. Refer to the wiring diagram provided for specific connections. Typically, the Aprilaire 700 requires a 24VAC power source from the furnace control board. Use appropriate gauge wire (usually 18-22 AWG) for connections.
Connect the humidifier’s wires to the designated terminals on the furnace control board – often labeled ‘humidifier’ or ‘H’. Ensure secure connections and proper polarity. Double-check all wiring against the diagram before restoring power. Incorrect wiring can damage the humidifier or furnace.
Wiring Diagram Overview
The Aprilaire 700 wiring diagram illustrates the connections between the humidifier, the furnace control board, and the power source. Key components include the 24VAC power input, the solenoid valve control wire, and potentially a fan activation wire. Carefully study the diagram to identify each wire’s function and corresponding terminal.
Note the color-coding of the wires; this aids in correct identification. Typically, a common wire connects to the ‘C’ terminal, while the control wire connects to the ‘H’ terminal. The diagram also shows optional wiring for external humidistats or controls. Always prioritize safety and accuracy when interpreting and applying the diagram.
Connecting to Furnace Control Board
Locate the humidifier terminals on your furnace control board – typically labeled ‘H’ for humidification and ‘C’ for common. Ensure the furnace power is completely OFF before making any connections. Connect the humidifier’s control wire (usually blue) to the ‘H’ terminal and the common wire (usually white) to the ‘C’ terminal.
If your furnace requires a fan activation relay, connect the appropriate wire from the humidifier to the designated fan terminal. Double-check all connections for tightness and proper placement, referencing the wiring diagram. Incorrect wiring can damage both the humidifier and the furnace. Restore power cautiously after verifying all connections.
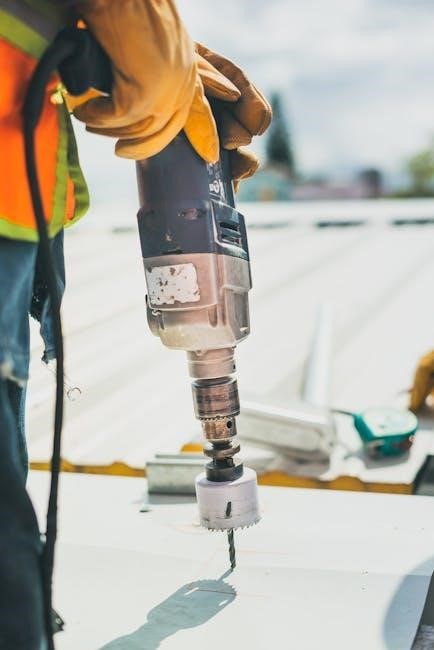
Evaporator Pad Installation
Remove the shipping material from the evaporator pad. Inspect the pad for any damage during transit; replace if necessary. Align the pad with the evaporator assembly, ensuring the textured side faces the airflow direction. Gently slide the pad into the designated slots or channels within the humidifier base.
Confirm the pad is securely seated and makes full contact with the water distribution system. Avoid bending or compressing the pad, as this restricts airflow and reduces efficiency. Proper pad installation is crucial for optimal moisture output and humidifier performance. A correctly installed pad will appear uniform and stable.
Humidifier Housing Assembly
Carefully align the humidifier housing components, ensuring all edges match seamlessly. Secure the housing using the provided screws, tightening them evenly to avoid stress cracks. Double-check that all panels are firmly attached and create a watertight seal. Inspect for any gaps or misalignments, correcting them before proceeding.
Connect any remaining ductwork or airflow components to the assembled housing. Verify that the water supply and drain lines are properly connected and secured. Ensure the housing is stable and won’t vibrate during operation. A properly assembled housing protects internal components and maximizes humidifier efficiency.
Initial System Startup & Testing
Following assembly, slowly turn on the water supply to the humidifier, inspecting for leaks at all connections. Activate the furnace fan to initiate airflow through the unit. Observe the evaporator pad for proper wetting – it should become evenly saturated. Monitor the drain line for consistent water flow, confirming adequate drainage.
Utilize the control panel to set a desired humidity level and verify the humidifier responds accordingly. Check for any unusual noises or vibrations during operation. Allow the system to run for at least 30 minutes, continuously monitoring performance. Address any issues immediately before full system use.
Control Panel Setup & Calibration
Begin by powering on the Aprilaire 700 control panel. Navigate to the settings menu using the designated buttons. Set the desired humidity level, typically between 30-50%, based on your comfort and home needs. Calibrate the humidity sensor if necessary, comparing readings to a trusted hygrometer;
Configure fan speed settings to optimize moisture distribution. Explore advanced features like automatic humidity control and energy-saving modes. Familiarize yourself with error codes and their meanings for troubleshooting. Save all settings and test the panel’s responsiveness. Refer to the full control panel manual for detailed instructions.
Troubleshooting Common Issues
If the humidifier isn’t producing enough moisture, check the water supply line and solenoid valve. Verify the evaporator pad is correctly installed and not clogged with mineral buildup. For no power issues, inspect the electrical connections and furnace control board.

Address excessive humidity by lowering the setpoint or checking the humidity sensor calibration. If you notice water leakage, examine the drain line for obstructions or damage. Consult the error code list in the manual for specific diagnostics. Remember to disconnect power before any internal inspection. Contact Aprilaire support for complex problems.
Maintenance Schedule
To ensure peak performance, replace the evaporator pad annually, ideally before the heating season. Inspect the water panel for scale buildup and clean or replace as needed – typically every 1-3 years. Flush the drain line twice yearly to prevent clogs and water damage.
Check the solenoid valve for proper operation and clean the water inlet screen annually. Visually inspect all water lines and connections for leaks during seasonal checks. Calibrate the humidity sensor every few years for accurate readings. Regular maintenance extends the humidifier’s lifespan and maintains air quality.
Warranty Information & Support
Your Aprilaire 700 humidifier is covered by a five-year limited warranty on all parts, protecting against manufacturing defects. Registration of your product within 90 days of installation is required to validate the full warranty period; visit our website for details.
For technical support, troubleshooting assistance, or warranty claims, please contact Aprilaire Customer Care at 1-800-307-7294 or visit our comprehensive support website at aprilaire.com. Detailed FAQs, installation videos, and replacement parts are readily available online. Keep your proof of purchase for warranty service.